Embarking on a culinary journey with a grill is a delicious adventure that promises the creation of exceptional flavors.
Traeger grills, renowned for
their versatility and wood-fired magic, offer a unique and user-friendly
experience, making them the perfect companion for seasoned grill enthusiasts
and those stepping into outdoor cooking for the first time. In this guide, we
will delve into the fundamental techniques and essential tips that will empower
you to wield your Traeger with confidence, unlocking the full potential of this
remarkable cooking tool.
So, join us on this flavorful journey as we
navigate through the essential elements of grilling. By the end, you`ll be
well-versed in the nuances and equipped to create gastronomic delights that
will leave your guests and your taste buds eagerly anticipating your next outdoor
culinary masterpiece. Welcome to the world of Traeger grilling—where every meal
is an opportunity to savor the rich, smoky essence of wood-fired perfection.
1. Choosing the Right Grill:
Before you start grilling, you must
understand the type of Grill you`re working with. Whether it`s a gas grill,
charcoal grill, or the increasingly popular pellet grill like Traeger, each has
its nuances. Familiarize yourself with the basic components, such as the
burners, grates, and temperature controls. Traeger grills are user-friendly for
beginners, offering a consistent and controlled cooking environment.
2. Essential Grilling Tools:
Investing in the right tools is crucial for
a successful grilling experience. Equip yourself with a quality meat
thermometer, long-handled tongs, a grill brush for cleaning, and heat-resistant
gloves. These tools will make your grilling safer and enhance your control over
the cooking process.
3. Understanding Heat Zones:
Grills typically have different heat zones,
and understanding how to utilize them is key to achieving the perfect cook.
Learn to create direct and indirect heat zones on your Grill. Direct heat is
ideal for searing, while indirect heat is better for slower cooking and
smoking. Mastering these zones will give you flexibility and control over your
cooking.
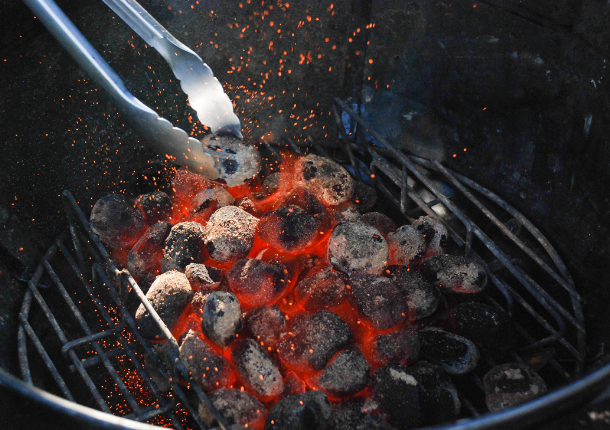
4. Preheating:
Before placing any food on the Grill,
preheat it to the desired temperature. This ensures the grates are clean,
minimizes sticking, and creates appealing grill marks. For gas grills, preheat
with the lid closed, and for charcoal or pellet grills, allow enough time for
the coals or pellets to ignite and stabilize.
5. Proper Seasoning and Marination:
Enhance the flavor of your grilled dishes
by mastering the art of seasoning and marination. Simple salt and pepper can go
a long way but don`t hesitate to experiment with herbs, spices, and marinades.
Allow your meats to marinate for adequate time to let the flavors penetrate.
6. Grilling Techniques:
Learn the basics of direct and indirect
grilling. Direct grilling involves cooking food directly over the heat source, which
is suitable for smaller cuts or items that cook quickly. Indirect grilling, on
the other hand, is ideal for larger amounts or delicate foods that require
slower cooking. Additionally, practice the two-zone fire method on charcoal
grills for greater control over cooking temperatures.
7. Mastering Grill Marks:
Achieving those coveted grill marks adds
visual appeal to your dishes and imparts a unique flavor. To achieve perfect
grill marks, place the food on the hot grill grates at a 45-degree angle for a
few minutes, then rotate the food 90 degrees for the remaining cooking time.
8. Monitoring Doneness:
Invest in a reliable meat thermometer to
ensure your food reaches the desired level of Doneness. Different meats have
specific internal temperatures that indicate when they are perfectly cooked.
Refer to a temperature guide for accuracy and consistency in your grilling
results.
9. Resting Period:
After taking your foot off the Grill, allow
it to rest before serving. This crucial step allows the juices to be
redistributed, producing juicier and more flavorful meats. Cover the food
loosely with foil and let it rest for about 5-10 minutes, depending on the size
of the cut.
10. Safety First:
Lastly, prioritize safety during your
grilling adventures. Keep a fire extinguisher nearby, Grill in a
well-ventilated area, and follow all safety guidelines provided by your grill
manufacturer.
Top 10 Must-Try Recipes for Your
Traeger Grill
Unlocking the full potential of your
Traeger grill opens up a world of culinary possibilities. From the rich, smoky
flavors of classic barbecue to unique and innovative dishes, your Traeger can
do it all. Whether you`re a seasoned griller or just getting started, these top
10 must-try recipes will inspire you to explore the diverse flavors achievable
on your Traeger grill.
1. Smoked Tri-Tip with Herb Butter:
Impress your guests with a perfectly smoked
tri-tip seasoned with a savory herb rub and finished with luscious herb butter.
The Traeger`s consistent temperature control ensures a tender and flavorful
result every time.
Ingredients:
For the Tri-Tip:
For the Herb Butter:
Instructions:
Preparing the Tri-Tip:
1. Preheat the Traeger Grill:
Start by preheating your Traeger grill to
225°F (107°C). Ensure you have enough wood pellets to maintain a steady smoke
throughout the cooking process.
2. Trimming and Seasoning:
Trim excess fat from the tri-tip, leaving a
thin layer for flavor. Mix the kosher salt, black pepper, garlic powder, onion
powder, paprika, and dried thyme in a small bowl to create the rub.
Rub the tri-tip with olive oil and
generously apply the seasoning mixture, ensuring even coverage on all sides.
Let it sit at room temperature for about 30 minutes while the Grill continues
to preheat.
3. Setting up the Traeger:
Place the seasoned tri-tip directly on the
grill grates, fat side up, and insert a meat probe into the thickest part of
the meat.
Close the lid and smoke the tri-tip until
the internal temperature reaches 135°F (57°C) for medium-rare or your preferred
Doneness. This usually takes around 2 to 2.5 hours.
4. Resting the Tri-Tip:
Once the tri-tip reaches the desired
temperature, please remove it from the Grill and tent it with aluminum foil.
Let it rest for at least 15-20 minutes. This allows the juices to redistribute,
producing a juicy and tender roast.
Preparing the Herb Butter:
1. Mixing the Ingredients:
While the tri-tip is resting, prepare the herb
butter. In a small bowl, combine the softened butter with chopped parsley,
rosemary, thyme, minced garlic, salt, and pepper. Mix until well combined
2. Rolling and Chilling:
Transfer the herb butter mixture onto a
piece of parchment or plastic wrap. Roll it into a log shape and twist the ends
to secure it. Place the herb butter in the refrigerator to chill and firm up.
Serving:
1. Slicing the Tri-Tip:
After resting, slice the tri-tip against
the grain into 1/4 to 1/2-inch slices. This ensures tenderness in every bite.
2. Adding the Herb Butter:
Plate the sliced tri-tip and top each
portion with a pat of the chilled herb butter. Allow the butter to melt
slightly over the warm meat.
3. Garnishing:
Optionally, garnish the dish with
additional fresh herbs for a burst of color and added flavor.
4. Serve and Enjoy:
Serve the smoked tri-tip with herb butter
alongside your favorite sides. This dish is sure to impress with its perfect
blend of smokiness, herb-infused flavors, and tender texture.
Now, sit back, relax, and delight in
serving a restaurant-worthy smoked tri-tip with herb butter to your guests or
family. Your Traeger grill has transformed this classic cut of meat into a
culinary masterpiece.
2. Traeger Pulled Pork Tacos:
Slow-cooked pulled pork is a barbecue
classic, and your Traeger makes it a breeze. Shred the succulent pork and served
in warm tortillas with your favorite slaw and toppings for a mouthwatering taco
experience.
3. Cedar Plank Salmon with Dill Sauce:
Elevate your seafood game with cedar plank
salmon. The Traeger infuses the fish with a delicate smokiness, while a zesty
dill sauce adds the perfect finishing touch.
4. Traeger Grilled Pizza:
Pizza night to a new level by grilling your
pizza on the Traeger. The wood-fired flavor enhances the crust; you can
customize the toppings to suit your preferences.
Traeger Grilled Pizza Recipe
Ingredients:
For the Pizza Dough:
For the Pizza Toppings:
Instructions:
Preparing the Pizza Dough:
1. Activate the Yeast:
In a
bowl, combine warm water and sugar. Stir until the sugar is dissolved. Sprinkle
the yeast over the water and let it sit for 5-10 minutes until it becomes
frothy.
2. Mixing the Dough:
In a large mixing bowl, combine the flour
and salt. Make a well in the center and pour the activated yeast mixture and
olive oil. Stir until a dough forms.
3. Kneading:
Turn the dough onto a floured surface and
knead for about 5-7 minutes until it becomes smooth and elastic. Alternatively,
use a stand mixer with a dough hook attachment.
4. First Rise:
Place the dough in a lightly oiled bowl,
cover it with a damp cloth, and let it rise in a warm place for 1-2 hours or
until it has doubled.
5. Punch Down and Second Rise:
Punch the risen dough and divide it into
two portions for two pizzas. Shape each portion into a ball and let them grow
for 30 minutes.
Preparing the Traeger Grill:
1. Preheat the Grill:
Preheat your Traeger grill to high heat,
around 450-500°F (232-260°C).
2. Rolling Out the Dough:
Roll out each dough ball into your desired
pizza crust thickness on a floured surface. Transfer the rolled-out dough onto
a pizza peel or an inverted baking sheet dusted with flour or cornmeal.
3. Grilling the Dough:
Carefully transfer the rolled-out dough
onto the preheated Traeger grill grates. Close the lid and Grill for 2-3
minutes or until the crust has grill marks and is firm enough to flip.
4. Flipping the Dough:
Using tongs or a spatula, flip the dough to
grill the other side for an additional 1-2 minutes. This ensures a fully cooked
and slightly crispy crust.
Assembling and Grilling the Pizza:
1. Adding Toppings:
Remove the grilled pizza crust from the Grill
and quickly add your favorite toppings. Start with a thin layer of tomato sauce,
a generous amount of shredded mozzarella, and your chosen toppings.
2. Returning to the Grill:
Carefully place the topped pizza back on
the Traeger grill. Close the lid and continue grilling for 5-7 minutes or until
the cheese is melted and the crust is cooked to your liking.
3. Final Touch:
Once the pizza is cooked, remove it from
the Grill. Drizzle with olive oil and garnish with fresh basil leaves if
desired.
4. Slice and Serve:
Allow the pizza to cool for a few minutes
before slicing. Serve your Traeger grilled pizza hot, and enjoy the wood-fired
flavor and crispy crust.
Tips:
With this Traeger Grilled Pizza recipe, you`ll
elevate your pizza night to a whole new level, enjoying the distinctive wood-fired
flavor and the freedom to customize your pizza to perfection. Gather your
family and friends for a delightful and delicious grilling experience!
5. Maple Glazed Traeger Smoked Chicken
Wings:
Achieve crispy and flavorful chicken wings
with an irresistible maple glaze. Traeger`s versatility allows you to smoke and
crisp up the wings for the perfect combination of smokiness and crunch.
6. Texas-Style Brisket:
For the ultimate barbecue experience, try
smoking a Texas-style brisket. The Traeger`s long, slow cook will render the
brisket tender and packed with flavor.
7. Traeger Applewood Bacon-Wrapped
Shrimp:
Combine the sweetness of applewood smoke
with the savory goodness of bacon-wrapped shrimp. This appetizer is a
crowd-pleaser and a breeze to make on your Traeger
8. Honey Mustard Glazed Traeger Pork
Chops:
Infuse your pork chops with a sweet, tangy
honey mustard glaze on the Traeger. The result is a juicy and flavorful main
course that`s simple yet impressive.
9. Traeger Smoked Mac and Cheese:
Add a smoky twist to a classic comfort food
with Traeger smoked mac and cheese. The wood-fired flavor takes this dish to a new
level, making it a hit for kids and adults.
10. Grilled Peaches with Balsamic Glaze:
Grilled Peaches with Balsamic Glaze Recipe
Ingredients:
For the Grilled Peaches:
For the Balsamic Glaze:
Optional Garnish:
Instructions:
Preparing the Balsamic Glaze:
1. Combining Ingredients:
Combine balsamic vinegar, honey, Dijon
mustard, and vanilla extract in a small saucepan. Stir well to combine.
2. Simmering the Glaze:
Bring the mixture to a gentle simmer over
medium heat. Reduce the heat to low and let it simmer for 10-15 minutes or
until the glaze has thickened to a syrupy consistency. Keep a close eye on it
to prevent burning.
3. Cooling the Glaze:
Remove the saucepan from heat and allow the
balsamic glaze to cool. It will continue to thicken as it cools. Once cooled,
you can transfer it to a small bowl for easier drizzling.
Grilling the Peaches:
1. Preheating the Grill:
Preheat your Traeger grill to medium-high
heat, around 400°F (204°C).
2. Preparing the Peaches:
While the Grill is heating, brush the cut
sides of the peaches with olive oil. Drizzle honey over the peaches and
sprinkle with vanilla extract. For an extra touch, add a pinch of cinnamon.
3. Grilling the Peaches:
Place the peaches on the preheated Grill,
cut side down. Grill for 2-3 minutes until grill marks appear and the peaches caramelize.
4. Flipping and Grilling:
Flip the peaches carefully using tongs so
the cut side is facing up. Continue grilling for 2-3 minutes until the beauties
are tender but still hold their shape.
5. Removing from the Grill:
Once grilled to perfection, remove the
peaches from the Grill and place them on a serving platter or individual
plates.
Assembling the Dish:
1. Drizzling with Balsamic Glaze:
Drizzle the balsamic glaze generously over
the grilled peaches. Combining sweet, smoky peaches with the tangy balsamic
glaze creates a delightful flavor contrast.
2. Optional Garnish:
Sprinkle chopped fresh mint leaves over the
peaches for a burst of freshness. Serve with a dollop of whipped cream or a
scoop of vanilla ice cream for an extra indulgence.
3. Serve and Enjoy:
Serve the grilled peaches with balsamic
glaze immediately while they are still warm. The contrast of warm peaches,
sweet honey, and tangy balsamic creates a harmonious and elegant dessert.
This Grilled Peaches with Balsamic Glaze
recipe is a sweet ending to your Traeger feast and a celebration of the Grill`s
ability to enhance the natural sweetness of fruits. Enjoy this simple yet
sophisticated dessert with friends and family on warm summer evenings or as a
delightful finale to any meal.
Mastering the basics of grilling is an
exciting journey that involves a combination of technique, creativity, and a
passion for good food. By understanding your Grill, investing in the right
tools, and practicing fundamental techniques, you`ll soon become a confident
and skilled grill master. These top 10 must-try recipes for your Traeger grill
are just the beginning of your culinary adventure. Whether you`re a fan of
traditional barbecue or eager to experiment with unique flavors, your Traeger
is a versatile tool ready to bring your culinary visions to life. So, fire up
your Grill, gather your ingredients, and get ready to savor the delicious
results of your Traeger grilling masterpiece. So, fire up that Grill,
experiment with flavors, and enjoy the tasty rewards of your newfound grilling
expertise!